The Royal Coaster
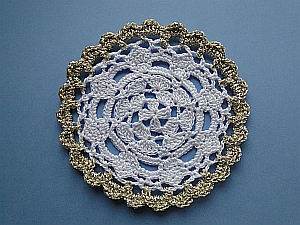
My Royal Coaster contains petals and crown shapes. You can work this in thread, adding a gold edging that uses a different hook.
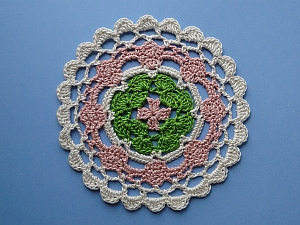
Alternatively, use the same yarn throughout - with the same hook! This one follows a slightly different edging pattern for the last round to achieve the same style:
The gold-edged coaster uses two different yarns and two sizes of hook:
- the body is worked in Puppets Eldorado size 10 thread and a 1.75 mm hook
- the edging uses Twilley's Goldfingering and a 2 mm hook
I haven't tried working a multicolor version with a gold edging ... yet!
The multicolor coaster is worked in the same yarn throughout - again, size 10 thread and 1.75 mm hook.
If you're using the same yarn for the whole coaster, you can
- work the coaster in one color - just plain! Looks very pretty
- work the coaster in two colors - your first color for Rounds 1 - 9, then your second color for the last two Rounds
- create your own color combo! (The "crown" shapes look best using one color for Rounds 6 - 8 in my opinion.)
- work my multicolor design above. I don't give instructions for tying off or joining in for this multicolor version - simply tie off at the end of the appropriate round then join in where the next round begins!
Here are the colors/rounds for the multicolor coaster above:
Round 1 - pink
Rounds 2 and 3 - green
Rounds 4 and 5 - cream
Rounds 6 to 8 - pink
Rounds 9 to 11 - cream
Measurement: both pieces measure just over 4"/10½ cm across.
|
|
Royal Coaster Pattern and Photo Tutorial
If you are not using the Goldfingering, your last round will be a little bit different, as you will not be changing hooks and yarn. So follow the pattern as shown for Rounds 1 - 10, then work the alternative Round 11 below!
Instructions are given in US terms, so here are the UK equivalents:
sc = UK dc
dc = UK tr
hdc = UK htr (for last round of edging if you are using the same yarn throughout)
~~~~~
Round 1: ch 4, 2 dc into 4th chain from hook.
(Ch 3, 3 dc into same chain) 3 times.
Ch 3, ss into top of 4 ch:
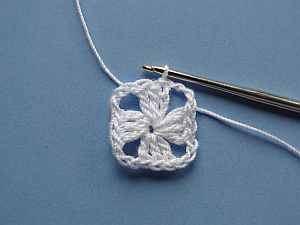 The end of Round 1.
~~~~~
Round 2: ss into each of next 2 stitches.
Ss into 3-ch space; ch 3 (counts as a stitch here and throughout the pattern); 5 dc into same space.
(Ch 3, 6 dc into next 3-ch space) 3 times.
Ch 3, ss into top of 3 ch:
 The end of Round 2.
~~~~~
Round 3: In Round 3 we work into the first and last stitch of each group of 6 stitches from Round 2, skipping the ch-3 spaces.
Ch 3, 5 dc into same chain you joined into; 6 dc into last stitch of that group.
(6 dc into first stitch of next group, 6 dc into last stitch of that group) 3 times.
Join with a ss into top of 3 ch.
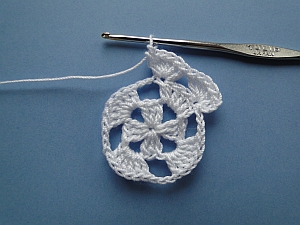 The first two groups of 6 stitches.
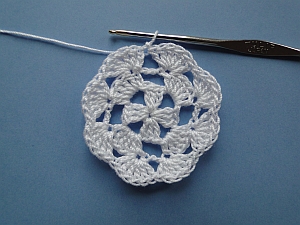 The end of Round 3.
~~~~~
Round 4: In Round 4, we also work into the first and last stitch of each group of 6 stitches.
Ch 1, sc into same chain you joined into; ch 6, sc into last stitch of that group.
(Sc next stitch, ch 6, sc into last stitch of that group) 7 times.
Join with a ss into first sc.
(Eight loops worked, each with 2 sc in between.)
 The first group of sc, ch 6, sc.
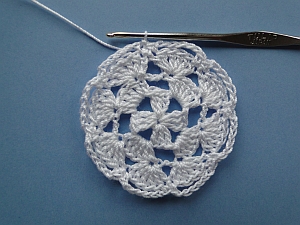 The end of Round 4.
~~~~~
Round 5: ss into first 6-ch space; ch 1, 8 sc into same space.
(Ch 2, 8 sc into next 6-ch space) 7 times.
Ch 2, join with a ss into first sc:
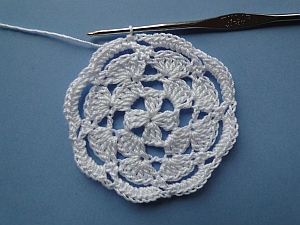 The end of Round 5.
~~~~~
Round 6: In Round 6 we work into the first and last stitch of each group of 8 stitches, before working into the 2-ch space :)
Ch 1, sc into same stitch you joined into.
Ch 6, sc into last stitch of that group of 8 stitches.
3 dc into 2-ch space. These three dc (UK tr) form the base of what I call the "crown" shape.
(Sc into first stitch of next group of 8 stitches - see tip below if you can't see the stitch; ch 6, sc into last stitch of that group; 3 dc into 2-ch space) 7 times.
Join with a ss into first sc.
Tip: That 1st sc into the next group of 8 stitches sits right next to your 3 dc. If in doubt, count back from the 8th sc to see where the first one is! See second pic below:
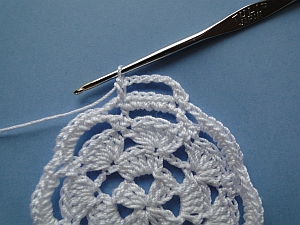 The first loop ...
 Three dc (UK tr) into space to make the start of the "crown" shape. The next stitch to work into is visible just next to the dc I have just worked.
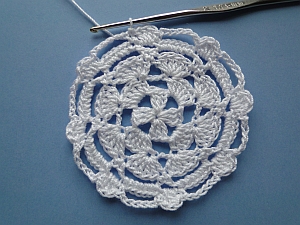 The end of Round 6.
~~~~~
Round 7: In Round 7 we will skip each of the 1 sc worked on either side of the crown.
We only work into the 6-ch spaces and into each of the 3 dc (UK tr) of the crown.
Ss into first 6-ch space; ch 1, 7 sc into same space.
Into each of the dc (UK tr) of the crown we work:
1 sc into 1st dc; 3 dc into next dc; 1 sc into next dc.
(7 sc into next 6-ch space; Then into the crown: 1 sc into 1st dc; 3 dc into next dc; 1 sc into next dc) 7 times.
Join with a ss into first sc.
 Working around the crown.
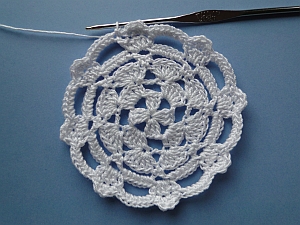 End of Round 7.
~~~~~
Round 8: ch 1, sc into same stitch you joined into.
(Ch 3, skip next 2 stitches, sc into next stitch) 2 times.
Next, we work only into the dc (UK tr) of the crowns - so again, we skip the 1 sc on each side of them:
1 sc into 1st dc; 3 sc into next dc; 1 sc into next dc.
*Working into the group of 7 stitches now: 1 sc into first sc of that group.
(Ch 3, skip next 2 stitches, sc into next stitch) 2 times.
Now into the crown: 1 sc into 1st dc; 3 sc into next dc; 1 sc into next dc*
Repeat from * to * 6 times; ss into first sc to join.
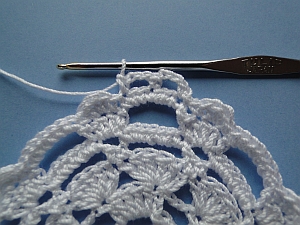 First two loops of chain.
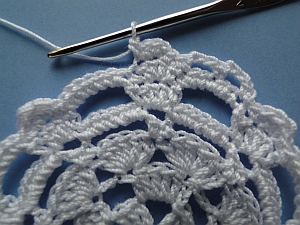 Working sc (UK dc) around the top stitches of the crown.
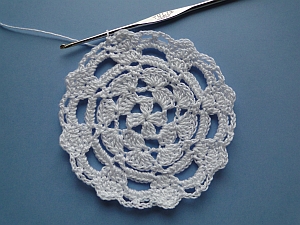 End of Round 8.
~~~~~
Round 9: ss into first 3-ch space; ch 1, sc into same space.
Ch 4, sc into next 3-ch space.
Ch 4, sc into center sc of the crown - which is the 4th stitch along after the chain space - see pic below!
*(ch 4, sc into next 3-ch space) 2 times.
Ch 4, sc into center stitch of crown*
Repeat from * to * 6 times; ch 4, ss into first sc to join.
(24 loops worked.)
Tie off and weave in end (unless you are continuing in the same yarn, of course!)
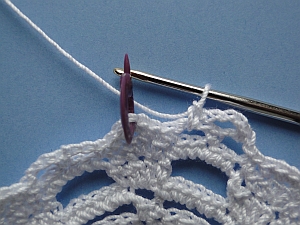 Stitch marker shows where to work the stitch into the center top stitch of the crown.
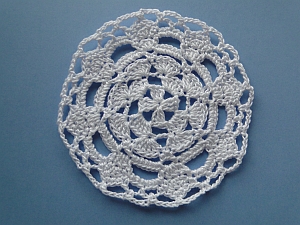 End of Round 9.
~~~~~
Round 10: Edging!
- If you are continuing in the same color and yarn: ss into the next 4-ch space.
- If using the Goldfingering: change to a 2 mm hook.
For those of you changing to your gold yarn or your other color yarn, join into the center ch-4 space between two crowns.
I make a slip knot, then bring the loop through to the right side:
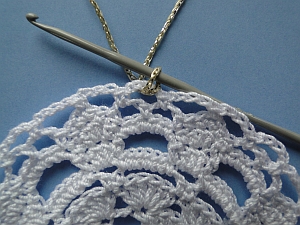 Joining in the gold yarn.
OK, now everyone is in the same place with their yarn! Let's continue:
Ch 1, sc into same space.
(Ch 5, sc into next ch-4 space) 23 times.
Ch 5, ss into 1st sc to join.
(24 loops worked):
 End of Round 10.
~~~~~
Remember: there are two sets of instructions for Round 11 - the first is if you're using Goldfingering, the next for those of you using the same yarn for the whole pattern.
Round 11 for Goldfingering yarn only: ss into first 5-ch space.
Ch 1; 1 sc, 3 dc, 1 sc into same space.
(1 sc, 3 dc, 1 sc into next 5-ch space) 23 times.
Tie off, and weave this tail end from front to back under the top two loops of the next stitch, then weave in, before weaving in the other tail end.
Tip: Goldfingering can be ironed on a very cool iron. So I cool-ironed this piece, turning the coaster over and ironing only the back, which made all the stitches and rounds settle nicely into place!
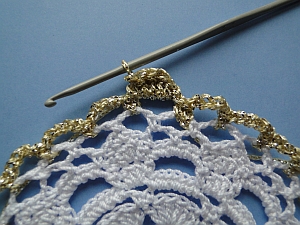 Starting Round 11.
Round 11 if you are using the same yarn throughout: ss into first 5-ch space.
Ch 1; 1 sc, 1 hdc, 3 dc, 1 hdc, 1 sc into same space.
(1 sc, 1 hdc, 3 dc, 1 hdc, 1 sc into next 5-ch space) 23 times.
Tie off, and weave this tail end from front to back under the top two loops of the next stitch, then weave in, before weaving in the other tail end.
Tip: it's a good idea to turn the coaster over and iron it gently on the wrong side to completely flatten the piece.
~~~~~
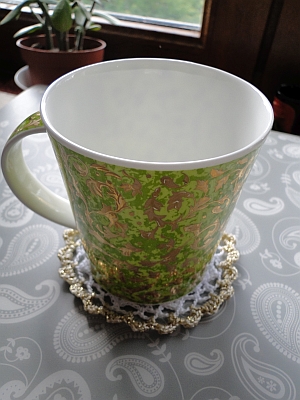 The Royal Coaster with a gold-leaf mug!
Stay in touch with me through Facebook :)
~~~~~
- Home
- Coasters & Doilies
- Royal Coaster
