How to Crochet Around a Leaf
|
|
The inspiration behind this project came from Susanna Bauer's crocheted leaf sculptures.
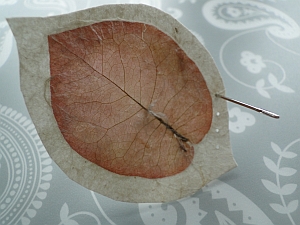
Susanna crochets into the leaf itself. But I remembered that I had some hand made paper with real leaves! So I found a nice leaf and cut around it, leaving a margin of the paper bordering the edge.
You could find a leaf and glue it to some paper/card and cut around that, if you like.
In fact, for my next leafy project, this is what I will do. My leafy paper was as light as air, and so difficult to crochet through!
OK - now for the holes in the margin. These were worked carefully with a needle first. Then I went through each hole with the hook before starting to crochet, to ensure the hook fitted into the hole.
I decided to use a 1.00 mm hook and size 40 cotton thread.
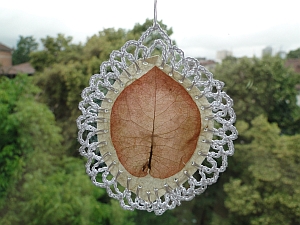
I drew the yarn through the hole at the bottom right of the leaf and made my starting chain; then worked 6 ch and ss into the next hole. So up the first side I went, chaining 6 then gently working a slip stitch, trying not to tear my very fragile paper!
When I got to the top, I worked a longer chain with a picot in the middle to get a pointy shape. The top of the leaf is irregular, so I had to work the picot a few times to find the best position along the chain for it.
Then down the left hand side I went and around to the bottom, where I made a slightly bigger loop before joining 1st loop with a ss.
The 2nd round used loops of 5 chain. I simply worked another loop with a picot over the first picot at the top!
Then I added a thread through the top picot to make a hanger.
You could use such a leaf on a card for an embellishment, as well as using it as a hanging ornament.
And as it is such a beautiful autumn, I really should go and find another leaf to decorate!
~~~~~
- Home
- Tips & Techniques
- Crochet Around a Leaf

